Organizing My Images

Where Do I Start?

#1 Begin to Organize Your Physical Images

Decide which photos have some kind of story or meaning behind them.

Your ancestral photos would be important to scan and upload to FamilySearch.

When it comes to your personal family or individual photos, decide which photos truly have meaning. I have seen FamilySearch Center patrons just scan everything from vacation scenery photos, people they do not even know, duplicated photos of the family dog, and so forth. Sort out those “meaningless” photos and don’t worry about spending all the time scanning them.

You can always come back later and scan some of the images that you have put to the side, especially if you discover more information about them. Just remember that you would like to complete this photo organization task sometime "within the next decade.”🤗

There is perhaps one exception to the above recommendation. If you have slides to digitize, it may be easier to scan them all so that you can more easily view what content is in them.

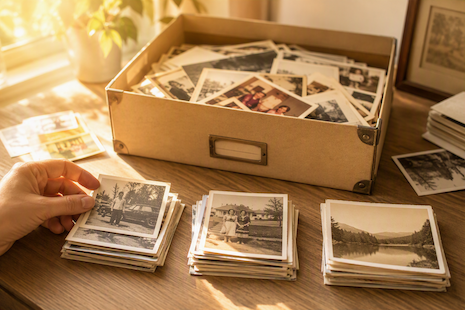
Organize your physical photos into piles by years.

You do not need to physically go through ALL your photos at once. Grab a stack, perhaps 200 or so at a time, and then physically sort them into groups by year.

Once you have your photos sorted into separate groups by years, go through each “years” pile and then separate those photos into “events” such as vacations, birthdays, Christmas holidays, and so on. If you don’t know a year for the photo, but you do know the decade, put those photos in a “decade” group. This could be something like “1950s", "1960s", "1970s", and so forth)

You may find that you just don’t have that many photos for each “event”. That’s okay as you can just keep them in the general year folder. As we will discuss later when naming your images, you can label them with a month and year date at the beginning of the digital filename.

#2 Create a Folder Structure on Your Computer

The MOST important point here is to keep ALL your scanned photos under ONE primary folder. In my case, I just created a folder named "Meyers Family Photos". This is your TOP level folder. It could be stored inside the “My Pictures” system folder. I keep my folder in my “Documents” folder since everything in my Documents folder syncs with iCloud.

Sorting by Year

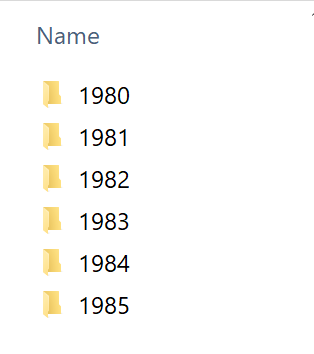
You can begin to create your digital folders on your computer to match the physical piles you have created. You might have have created photo piles, say for "1991” and "1992”. Create those same folders on your computer under your primary folder. Your folder structure may begin to look something like that in Example One.

If you have a pile of general decade photos, create a file folder like discussed above, ie "1960s”, "1970s”, and so forth. They will sort in the folder structure appropriately.

Example One

Sorting by Events

Within your year piles, you will likely have different “events” that happen during the year, like a birthday party, high school graduation, Yellowstone vacations, Thanksgiving events, and so forth.

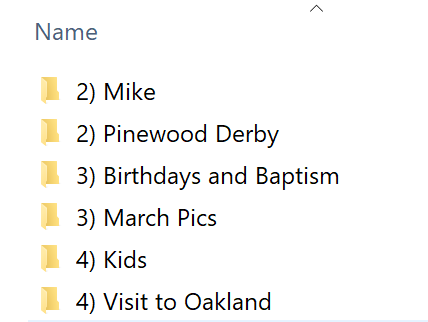
If you have a March birthday party for Sarah, create a subfolder like:

3) Sarah’s Birthday Party

For Thanksgiving photos, create a subfolder something like:

11) Thanksgiving in Utah

The numbers before the event description are simply the month that the event occurred in. As you create your folder structure you will more easily be able to drop your scanned photos into the appropriate folders.

Example Two

#3 Scan Small Batches

Spend an hour or so scanning your photos then move them into the folder structure.

As soon as your scanning session is over, begin dropping your images into the file structure you have set up. It is far easier to complete this process soon after scanning because the scanned photos are still fresh on your mind.

Be sure to be familiar with the Proper Scanner Settings for your photos. You may have anything from 2”X3” photos up to 8”x10” photos. These should be scanned with DIFFERENT scanner DPI settings.

Can you imagine trying to go through thousands of digitized photos, that took many months or more to scan, and then trying to move them into an appropriate folder structure? I bet that the organizing effort never gets completed!!

By doing small batches of pre-sorting photos, scanning, and then moving them into your folder structure, the process of organization gets done more quickly in the long term.

In Summary:

  • Don’t plan on scanning ALL your images. Many may have no meaning to anyone without a real story behind them.
  • Work in smaller “batches”. Sort them into years and events. Make computer folders that match the years and events. Scan these photos and then move them into your organized computer folders.
  • After you have scanned your photos, don’t forget to name the individual files. This makes them more searchable later.
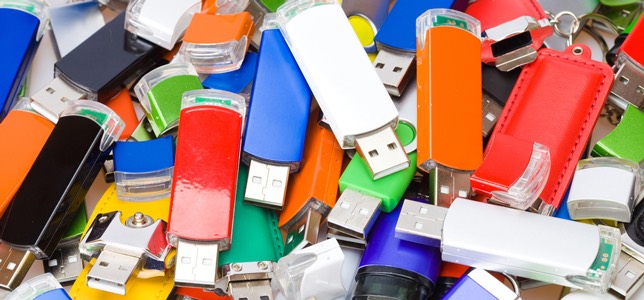
  • Safely Back Them Up to additional external drives (NOT to USB flash drives NOR SD cards)
  • Share these photos with family. Upload your best images to FamilySearch and then write a short memory about them. You may not have a memory about the photo, but other family members likely will. The family can collaborate and fill in details.
  • One other thought, if you don’t have that many documents and images, why not utilize FamilySearch to "organize" and store your images? We don’t want to just dump our photo collection there. If you have picked out the important photos and documents, upload these to FamilySearch and then you don’t have to worry about organizing and storing them. (I have heard a couple anecdotal stories of FamilySearch “losing” photos, but this would be very unusual.)
  • Enlist the help of family. Grandkids make especially good helpers with scanning!

FAQs

Problems With Scanning First, Then Organizing Later

This kind of sounds logical at first, however scanning thousands of photos and then trying to sort them afterwards typically doesn't work out well. I have personally been through this kind of scenario. Luckily I began to get smarter after a couple of thousand images. I realized I needed to work differently. With over 45,000 images in our family’s photo collection, it would have been "impossible" to scan them all and then sort later.

#1) Scanning over 45,000 physical photos and slides would take up a lot of time to complete this. This equates to almost 400gb of drive space.

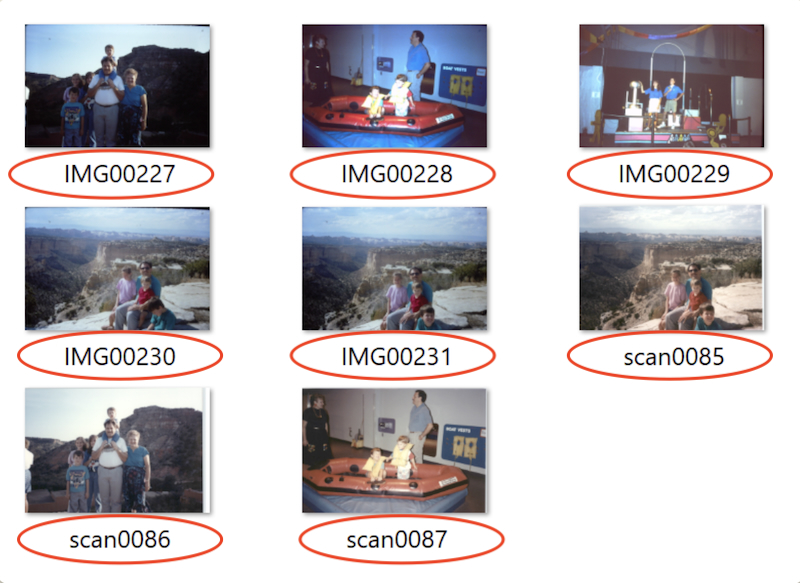
#2) If the scanning process took you a "year” to scan everything, you will not remember what photos are in what folder. How do you know what img0001, img0002, etc are since there is no descriptive filename attached to each photo. You will have to preview photo by photo to make a decision where to put the photos.

#3) You don’t have any type of folder structure set up on your computer to easily drag your photos into the appropriate folders.

With so many scanned photos, "brain fatigue" kicks in. Our thoughts become “I got the photos scanned, my kids can organize them.” The problem is that the kids will probably not know what people are in the photos like their parent or grandparent would know. (Hint: Have you ever gone back to look at one of your young children's photos and couldn’t remember exactly who that child is?)

“Project fatigue” has set in. The whole sorting project just stops. Why did we spend so much time in scanning “meaningless photos” of trees and mountains on our vacations, duplicate photos of the family dog, or past friends whose names we can no longer remember? The MOST important aspect of the whole project is to preserve the names with the faces!

Specific Issues With Flash Drives and SD Cards

  • Flash drives can easily get misplaced or lost.
  • Flash drive folders can become corrupted. You will see a “LOST.DIR” folder on the flash drive. That folder’s contents has been lost. 
  • Flash memory, when used frequently, shortens the lifespan of that memory. Used a few times and stored, the drives may last 4-5 years, but lifespan could easily drop to a year or so when used frequently.
  • Flash drive memory is not as stable as a solid state drive (SSD) nor a conventional USB hard drive. 

Guidelines for labeling scanned photos

The scanner software will have nonspecifically assigned a label to your scanned files. The file names will have a prefix (often “img”) followed by consecutive numbers. As an example, you might see img001, img002, img003 and so forth depending on the prefix you have selected.

Unfortutately, relabeling your filenames is pretty much a manual process done in Windows Explorer or Apple Finder by you. If you think about it, every photo has different content in it, different people, different setting, and such.

Suppose you have a photos of Henry’s high school graduation in May 1993. Your folder name is 5) Henry’s High School Graduation which does sit in the 1993 Year folder. I typically name my files with the year first, then month (if known), then a description of what is in the photo. This format will date stamp your images so they become sortable in the File Explorer. This would be more helpful if you kept all of your photos in a single YEAR folder without an event folder. Your filenames could look like the following:

1993(05) - Henry Getting His Diploma

1993(05) - Henry, His Grandpa Joe, His Father Harry in Front of School

1993(05) - Henry With His Mom Mary, His Sister, Suzie by Doorway

And so forth...

You could rename all the files that are in an event folder using a Windows "batch process” (all at the same time), such as, 1986(03) - Girl’s Birthday Party, and then each filename will end with a different number, like xxx001, xxx002, etc. The advantage to doing something like this is that the photos are better found should they meander outside the main event folder. Of course, there would be no descriptive information in the filename with this type of file renaming, like who is in the photo, location, and such. However, if you used metadata, the descriptive information could be contained in the metadata fields.

Using “metadata” (described below), you can add descriptive data like location, event comments, dates, tags with people’s names, and more. Adding metadata can greatly help you find files.

Does this sound like a lot of work? Yes, on the front end, but not on the back end when you are trying to search for your photo locations. You will reduce a lot of the problems with “I know I had some photos of the girl’s 9th birthday party somewhere”. If your posterity can find the photos of them easily, then you will have been successful in all your efforts. If they can’t … they may just erase that large digital collection of photos. (That’s sad!)

How Can Metadata Help Me Organize My Photos?

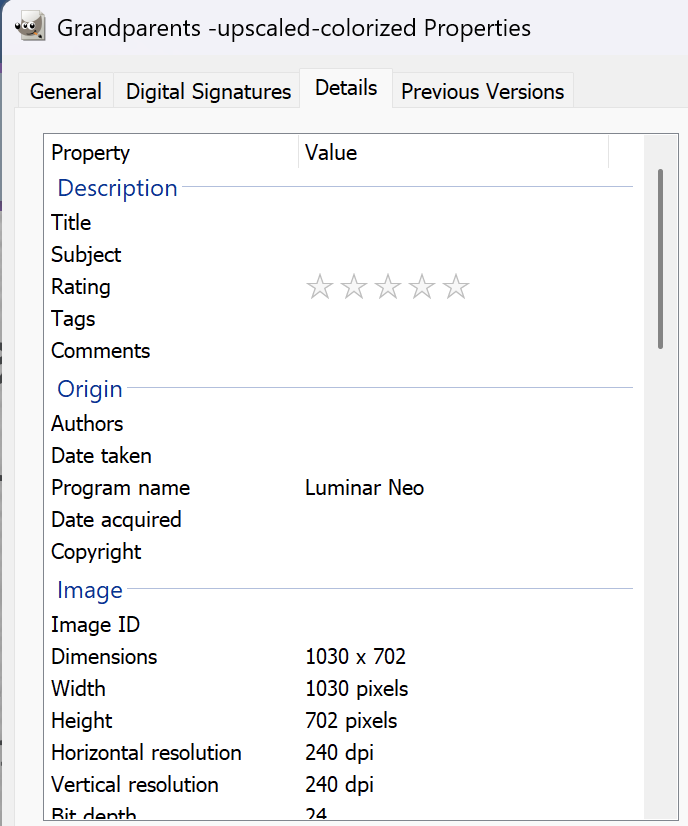
Metadata is additional hidden information that is attached to a file. GPS location, Comments, Rating Stars, Title, Comments, image resolution, and other such information is only a small amount of all that can be attached to a file. This data can be seen in Windows Explorer by right clicking on the file and then looking at the Properties link, then the Details tab.

You can create “tags” or keywords for example. The tags could be a person’s surname, or “birth certificate”, “marriage”, “Yellowstone”, “camping”, and so forth. These tags are easily searchable across a whole hard drive, not just in a specific file folder. Technically with good tags, you would not really need a file organization system.

Metadata is a really neat way to augment the way in which you find your files. As you learn to better organize your photos, the ability to find a specific file improves substantially. The handout below will have more examples of how metadata actually works.

Missionary Communications Board

© 2026 Stephen A Meyers, All Rights Reserved.

FamilyDiscoveries Menu